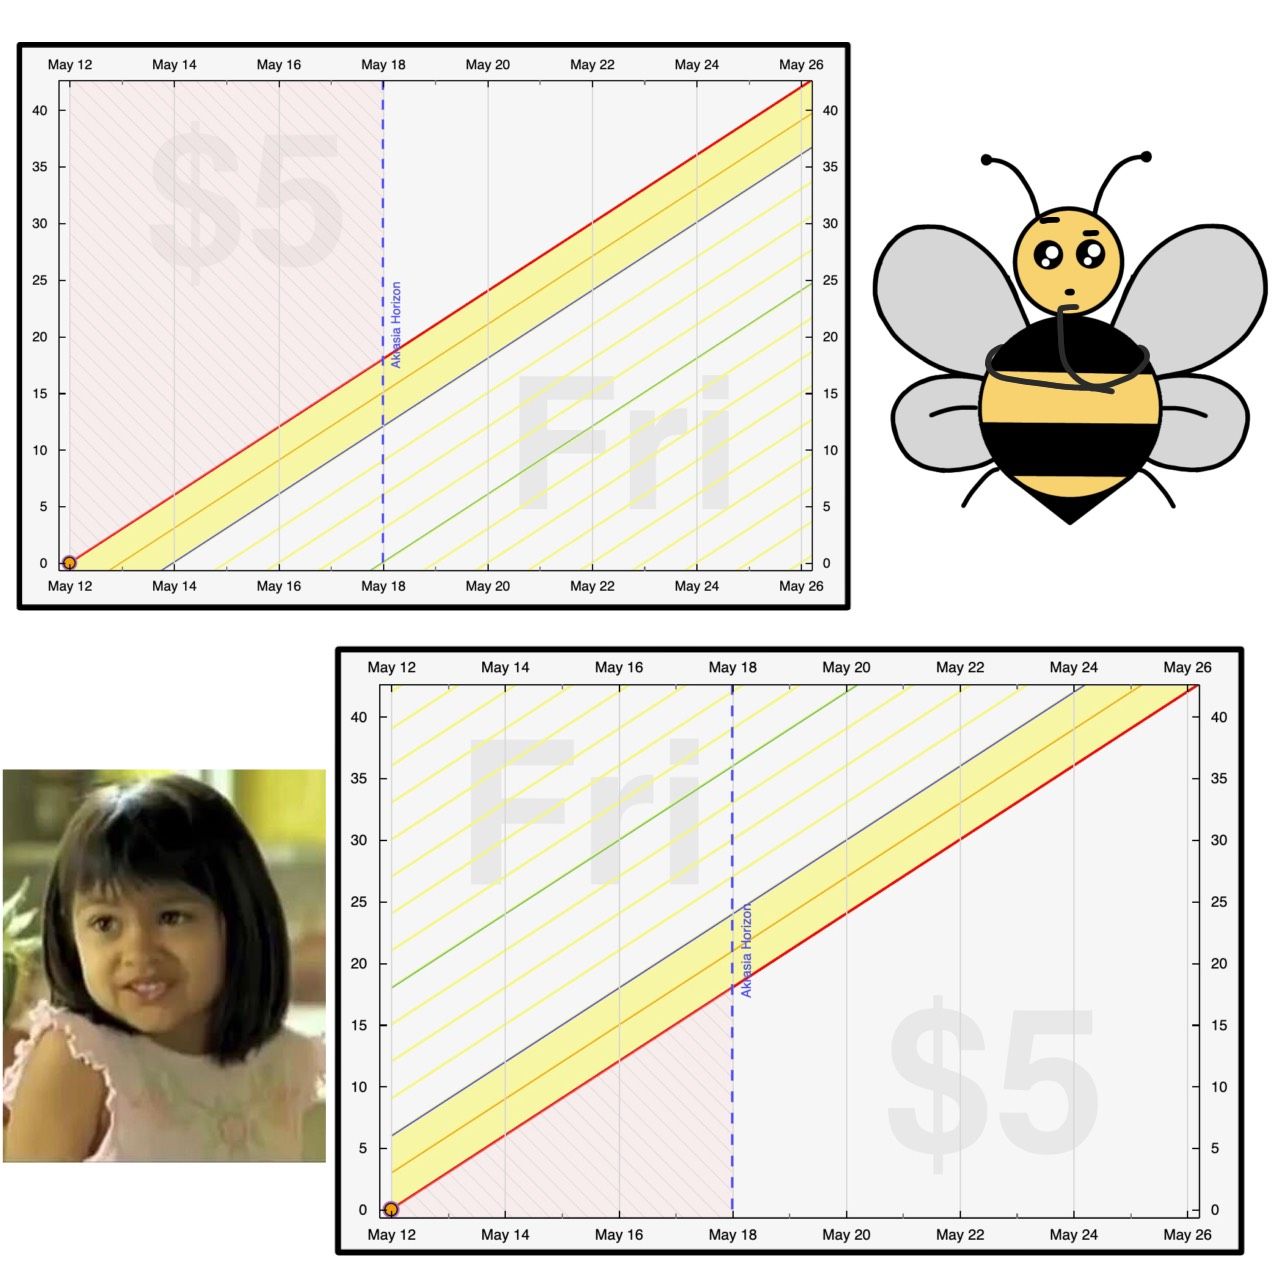
Way back in 2014 we blogged about how people who wanted to mind both sides of the red line (called the Yellow Brick Road in those days) were all wrong to want that. We’re still pretty opiniated and still aren’t adding this as a feature, but we thought we’d give a more nuanced answer and some more practical advice for those of you with not-too-much-not-too-little type goals.
Let’s start by talking about burnout and balance! There are plenty of anecdotes and a handful of studies about how productivity is affected by overwork: consider books like Dr Devon Price’s Laziness Does Not Exist (spoiler: the theory is that “laziness” is a sign from our brains and bodies that something is wrong, same as hunger or thirst), or studies which seem to suggest that productivity improves with shorter work-weeks.
This all seems like something that might not fit so well with Beeminder, with its binary goals — Do More / Do Less, Weight Loss / Weight Gain — and single Bright Red Line, not to mention our own blog post about never minding both sides. And it’s true that we don’t have any goal type that can keep you within a range, and it’s unlikely to be something we add anytime soon.
But! I think it’s totally possible to beemind both sides anyway, and even valuable at times. I have a number of graphs that beemind both sides, and they’re honestly some of my most important goals.
How do I do it?
By having two Beeminder graphs!
…I know, I know, that’s a really untechnical answer to the problem, and it’s something I think will be easier and perhaps more accessible once we have a “Beeminder meta” integration which can send data from one goal to another. (Currently you can hook up services like Zapier and IFTTT to do that, of course!)
If this is sounding kind of clunky to you, let’s see if I can convince you!
Allowing for nuance
The thing with having two separate goals for “Doing Enough Of A Thing” and “Not Doing Too Much of a Thing” is that it really lets you see where you’re struggling. It’s possible that you’ll derail on both goals equally, but it seems unlikely.
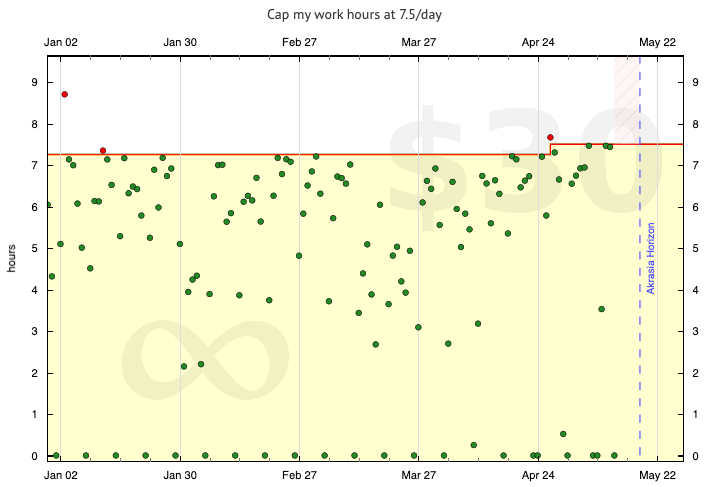
For me, I’m more likely to overwork than not work enough, for example. This is a thing I would never have guessed about myself, but I’ve never derailed on the goal that tracks the amount of time I need to spend working for Beeminder. By contrast, I’ve derailed on the goal that caps my hours worked per day three times so far in 2022. My problem isn’t even what I expected it to be, so having two goals for this gave me some really interesting data about my own behaviour!
It also allows you to set different rates for the two bounds. For instance, you may want a break on one (no need to do as much of the thing) while leaving the other at the same rate (it’s still important you do more than the lower bound), for instance. Or for one to be tracked in hours and another to be a binary yes/no. Maybe you could even do something clever with how the data aggregates per day in one graph, while the other just reports the straight data.
Most importantly for me, it allows the motivation (the pledge at stake) to be proportionate to the actual temptation to fail at the goal. You can be up to $270 on one goal because you always suck at studying enough, while you’re only at $10 on the other because you are actually pretty good at ensuring you stop for the day (as long as you have Beeminder nipping at your heels).
Having a single goal that just keeps you within a range and charges you for falling out of it collapses that important context and removes that proportionate response to ending up on the wrong side of the bright red line. I don’t want to suck at either, but it only takes $5 to keep me doing my daily hours, while we’re at $30 and counting for what will make me actually stop on time.
Nicky’s use cases
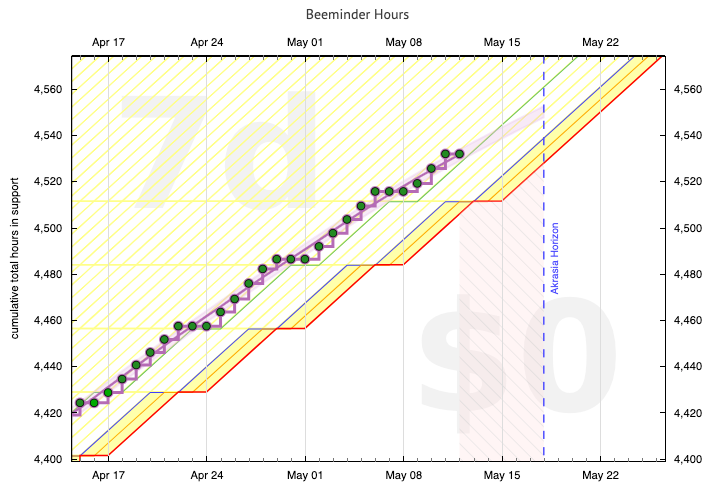
As always, I have some graphs to show off to make my point! Sometimes it’s straightforward: you beemind getting enough hours in one graph, and not doing too many in another. That’s the case with the meta goal that counts my Beeminder hours, and the goal that counts my total number of hours per day (though this also includes my hours for my side gig).
But you can also create balance via multiple Beeminder goals using different but related metrics. For instance, I also beemind my earnings: every evening I estimate how much I’ve earned during the day and put that into my earnings graph. So I want more money! But as I’ve remarked elsewhere, I’m a bag of nerves disguised as a person. I want to do all the work, and impress people thereby. My brain needs (a lot) more rest than I would naturally be inclined to allow it. So I would argue that the graph that really balances out my clockoff goal is this one:
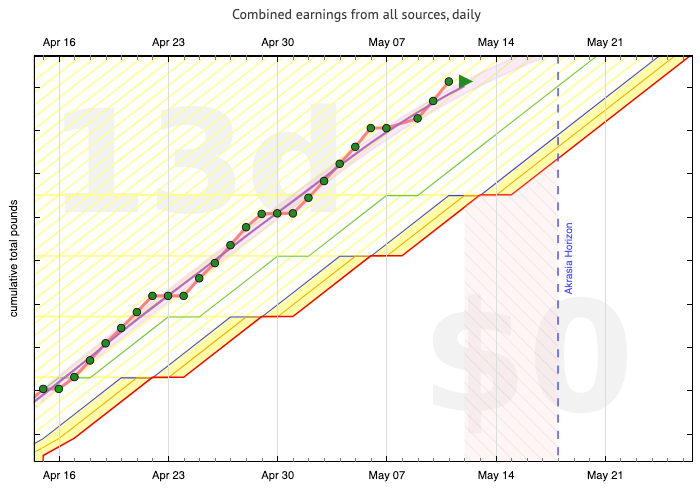
I end up beeminding staying under a certain number of hours per day, while also earning a certain amount of money per day. Earning is a better metric than the number of hours I work, because I have multiple clients. I can earn more in a given day by prioritising the work that pays better, while keeping below that threshold on my clockoff goal. The amount I earn and the number of hours I work are related numbers, but wouldn’t fit on the same graph very naturally.
I even balance my Beeminder usage in general. I have a lot of goals, a lot of plates spinning, and that takes a lot of time. I was noticing that my evenings were getting eaten by beemergencies. One solution to that would be custom deadlines, but that doesn’t work on most autodata goals. Enter my stopbyseven goal!
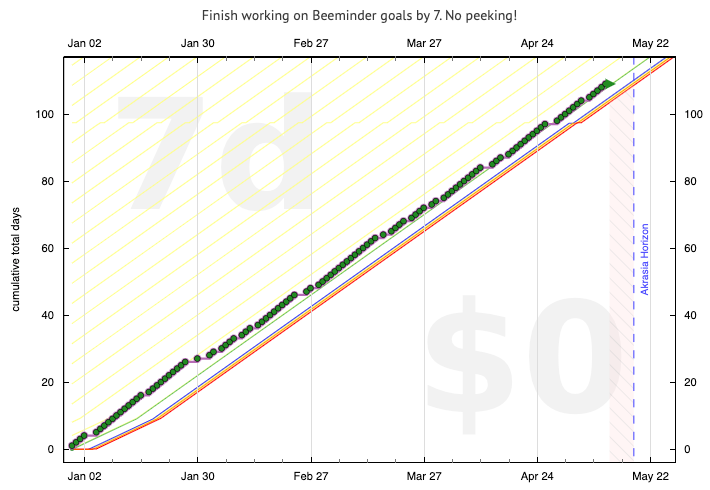
Now I have to finish my Beeminder goals by 7pm, six days out of every seven, leaving me a lot more time to loaf around and play video games.
Conclusion
We said once that it shouldn’t ever be necessary to beemind both limits, but let the record stand amended: Nicky at least is convinced that it can be useful to beemind both sides! My contention, though, is that Beeminder can already do that, and that it’s way more versatile, intuitive, and useful this way.
Image credit: Faire Soule-Reeves